How
to record with Cool Edit 2000 (cont.)
The
input sources available will vary according to your sound
card. You will likely see faders (slider controls) for Wave
Record, Synthesizer, CD, Microphone, and other input devices.
If you want to record from a microphone plugged into the Mic
port on the back of your sound card, select Microphone and
adjust its recording level. If you want to record from CD,
do likewise for the CD controls. You may also want to turn
OFF recording for the other inputs in order to minimize noise
while recording.
Selecting
and adjusting record levels is an important part of recording
on the computer. It may seem confusing at first, but once
you get used to it, checking the record levels will become
second nature.
When you have finished checking record levels, follow these
steps:
-
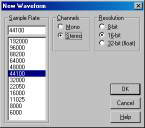
Pull down the File menu and select New. The New
Waveform dialog will ask you what Sample Rate and
Bit Resolution you want to use, and whether you want to
create a Mono or Stereo file. If you aren't sure what
to select, use 44100Hz, Stereo, 16-bit. These are the
settings used for CD-quality audio.
-
Click on the red record button in the transport
controls on the bottom left of the main window.
-
Sing!
(or play the CD, or the keyboard, or start whatever audio
you want to record).
-
When
you're done recording, click on the Stop button in the
transport controls.
Cool
Edit 2000 will draw the waveform you have just recorded. To
play it, click on the Play button.
Troubleshooting tips: if
only a flat line appears (no obvious waveform display), then
you probably need to check your record levels. If you can
see the waveform but can't hear it playing, check the play
levels. See above for instructions on accessing these controls.
For detailed information, see the help file index under "getting
started" and "levels".

